Most new application today are built using OIDC/OAuth protocols, and if you need a ASP.Net sample for that, you have plenty to choose from when working with Azure AD B2C as your identity provider. But if you have to work with the SAML protocol and B2C, the number of samples grow small – very small. In fact, there are more Java samples available than ASP.Net when working with SAML and B2C. This blog post is an attempt to close that gap and give you one.
Configure an Azure AD B2C SAML policy
Setting up a SAML signin policy in Azure AD B2C is a series of multiple steps. First, you need have a B2C instance. If you don’t just create one. It won’t cost anything until you go above 50K monthly active users signing in. Second you need to configure Identity Experience Framework to enable custom policies as SAML is only supported by B2C that way. Third, you need to create a B2C custom policy that supports the SAML protocol. In my accompanying github repo, I’ll provide you with a SAML B2C custom policy.
Documentation on getting started with B2C Custom Policy can be found here and documentation on how to create a SAML based B2C Custom Policy can be found here.
Creating the ASP.Net Core webapp
I’ve used Visual Studio 2019 to create the ASP.Net Core webapp from scratch and these are the steps.
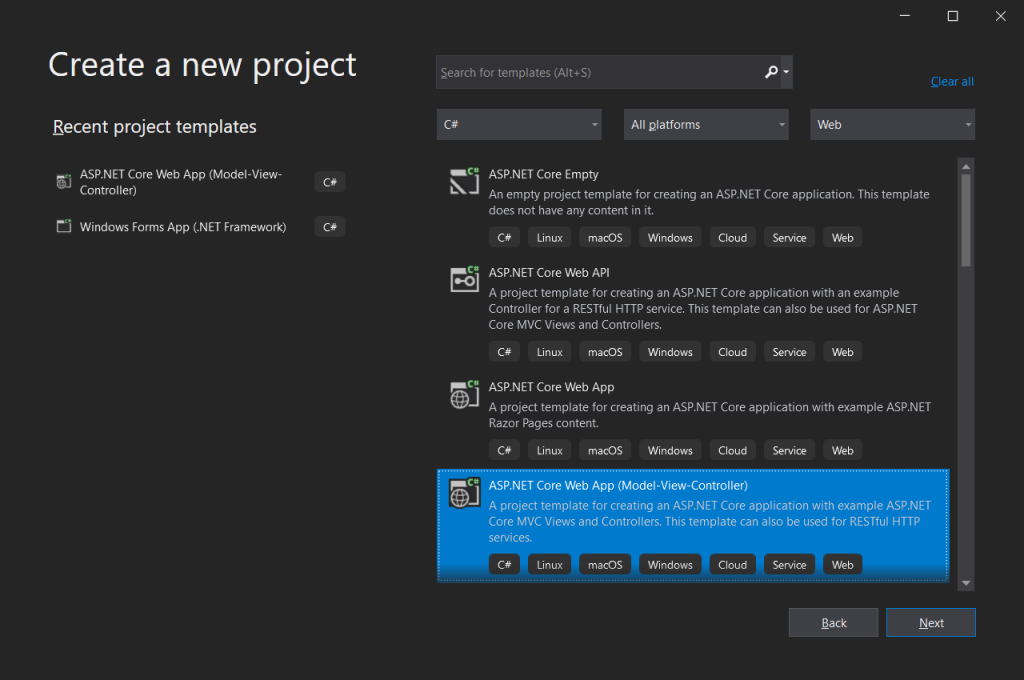
1. Create a new Visual Studio project
Create a new C# Web project and choose template ASP.NET Code Web MVC. In the next page, select aspnet core 3.1 as platform and Authentication Type as Microsoft Identity Platform.
2. Add Sustainsys SAML nuget package
We need a library that understands SAML and one of the more popular ones out there that supports aspnet core is Sustainsys.Saml2. In Visual Studio, add nuget package Sustainsys.Saml2.AspNetCore2. The most recent version at the time of writing this was 2.8.0.
3. Edit Startup.cs
Startup.cs needs some editing to make the webapp be a SAML Service Provider and use Azure AD B2C as its IDP. The ConfigureServices method should look like below (you have the full code in my github repo).
public void ConfigureServices(IServiceCollection services)
{
    // we need to associate SHA1/SHA256 with the long web-based names for Sustainsys.Saml2 to work
    System.Security.Cryptography.CryptoConfig.AddAlgorithm(typeof(RsaPkCs1Sha256SignatureDescription), System.Security.Cryptography.Xml.SignedXml.XmlDsigRSASHA256Url);
    System.Security.Cryptography.CryptoConfig.AddAlgorithm(typeof(RsaPkCs1Sha1SignatureDescription), System.Security.Cryptography.Xml.SignedXml.XmlDsigRSASHA1Url);

    services.AddAuthentication(sharedOptions =>
    {
        sharedOptions.DefaultScheme = Microsoft.AspNetCore.Authentication.Cookies.CookieAuthenticationDefaults.AuthenticationScheme;
        sharedOptions.DefaultSignInScheme = Microsoft.AspNetCore.Authentication.Cookies.CookieAuthenticationDefaults.AuthenticationScheme;
        sharedOptions.DefaultChallengeScheme = Sustainsys.Saml2.AspNetCore2.Saml2Defaults.Scheme;
    })
    .AddSaml2(options =>
    {
        options.SPOptions = new Sustainsys.Saml2.Configuration.SPOptions()
        {
            AuthenticateRequestSigningBehavior = Sustainsys.Saml2.Configuration.SigningBehavior.Never,
            EntityId = new Sustainsys.Saml2.Metadata.EntityId(Configuration.GetValue<string>("Saml2:EntityId")),
            MinIncomingSigningAlgorithm = Configuration.GetValue<string>("Saml2:MinIncomingSigningAlgorithm")
        };

        // We need to use a cert for Sustainsys.Saml2 to work with logout, so we borrow their sample cert
        // https://github.com/Sustainsys/Saml2/blob/develop/Samples/SampleAspNetCore2ApplicationNETFramework/Sustainsys.Saml2.Tests.pfx
        string certFile = string.Format("{0}\\{1}", System.IO.Directory.GetCurrentDirectory(), Configuration.GetValue<string>("Saml2:cert"));
        options.SPOptions.ServiceCertificates.Add(new System.Security.Cryptography.X509Certificates.X509Certificate2(certFile));

        // The Azure AD B2C Identity Provider we use
        options.IdentityProviders.Add(
            new Sustainsys.Saml2.IdentityProvider(
            new Sustainsys.Saml2.Metadata.EntityId(Configuration.GetValue<string>("Saml2:IdpEntityId")), options.SPOptions)
            {
                MetadataLocation = Configuration.GetValue<string>("Saml2:IdpMetadata"),
                LoadMetadata = true
            });
    })
    .AddCookie();

    services.AddControllersWithViews(options =>
    {
        var policy = new AuthorizationPolicyBuilder()
            .RequireAuthenticatedUser()
            .Build();
        options.Filters.Add(new AuthorizeFilter(policy));
    });
    services.AddRazorPages();
}
In order for Sustainsys.Saml2 to work with B2C, it needs a certificate for the webapp. You could generate a self issued cert, but you can save you some work by downloading the sample PFX cert that Sustainsys have here. Download it and place it in the project root folder.
The Startup.cs file also has some additional code for making the SHA1 and SHA256 algorithms available by the long URI names that SAML uses. I was a bit surprised that this was needed. Check the github repo for this and paste it at the end of Startup.cs.
4. Update appsettings.json with new configuration
Startup.cs uses configuration settings that are stored in appsettings.json. The EntityId is the name to which your webapp will be known to B2C when we do the App Registration. It is the OIDC equivalend of the client_id. The IdpEntityId is the B2C policy and the IdpMetadata is the endpoint for where your webapp can get SAML metadata for B2C.
{
  "Saml2": {
    "cert": "Sustainsys.Saml2.Tests.pfx",
    "EntityId": "https://localhost:5001/Saml2",
    "MinIncomingSigningAlgorithm": "http://www.w3.org/2000/09/xmldsig#rsa-sha1",
    "IdpEntityId": "https://yourtenant.b2clogin.com/yourtenant.onmicrosoft.com/B2C_1A_SAML_signup_signin",
    "IdpMetadata": "https://yourtenant.b2clogin.com/yourtenant.onmicrosoft.com/B2C_1A_SAML_signup_signin/samlp/metadata"
  },
  "Logging": {
    ...
}
Note that https://localhost:5001/Saml2 is for when I run it as a standalone process. If you prefer IISExpress, you will get a different port number.
5. Edit HomeController.cs
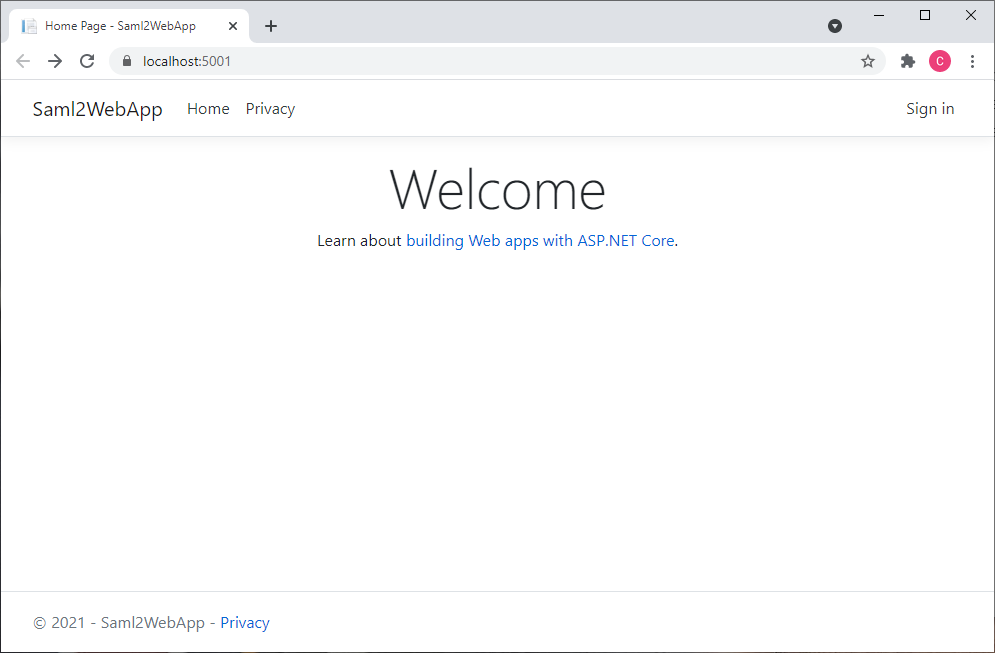
The generated HomeController.cs sets the [Authorize] attribute on the entire class, which makes the app require signin when you first hit the index page. Therefor, remove the [Authorize] attribute for the class and add [AllowAnonymous] for the Index and Privacy method. This launches the app without the need to signin and you can then press the Signin button.
6. Add AccountController.cs
We need a new controller that will handle the actions for sign in and sign out, so right click and add a new controller named AccountController.cs (use the MVC empty template). Copy the code from the github repo and paste over what was generated.
In the SignOut method, you need to add the SessionIndex and the LogoutNameIdentifier, which are two client side claims that the Sustainsys component added, for the sign out to work. If you don’t set these, the Sustainsys component will fail as it doesn’t know which session to sign out.
public IActionResult SignOut()
{
    _logger.LogInformation("SignOut()");
    var authProps = new AuthenticationProperties
    {
        RedirectUri = Url.Action(nameof(Index), "Home", values: null, protocol: Request.Scheme)
    };
    // you need these two in order for Sustainsys.Saml2 to successfully sign out
    AddAuthenticationPropertiesClaim(authProps, "/SessionIndex");
    AddAuthenticationPropertiesClaim(authProps, "/LogoutNameIdentifier");
    return SignOut(authProps, CookieAuthenticationDefaults.AuthenticationScheme, Sustainsys.Saml2.AspNetCore2.Saml2Defaults.Scheme);
}
7. Update the _Layout.cshtml view
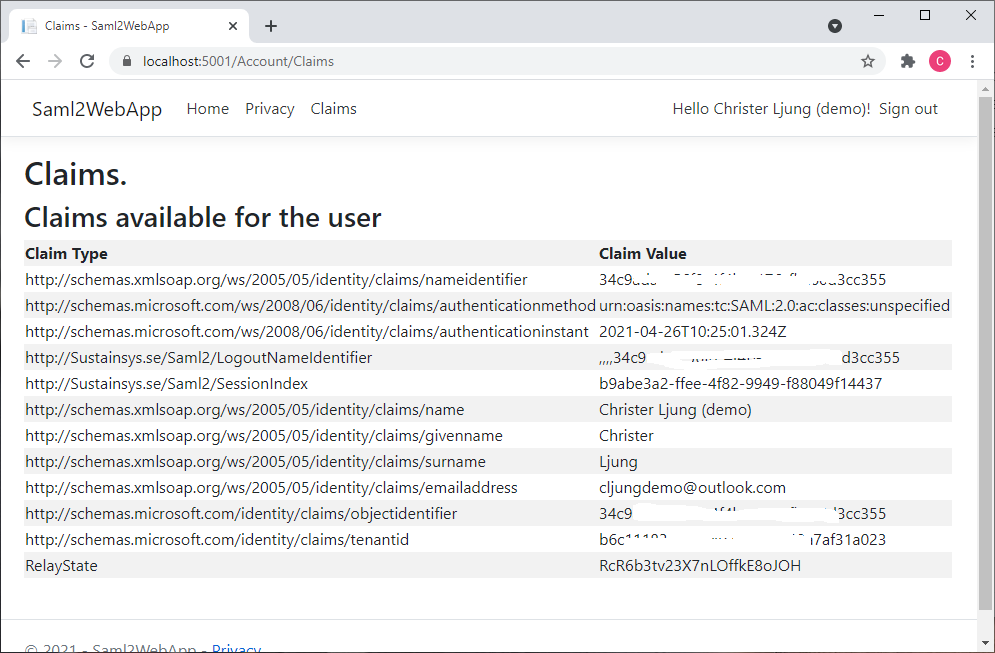
Since my sample adds a menu item named ‘Claims’ that will list the claims B2C issued, you need to update the view Views\Shared\_Layout.cshtml and add a link to it.
<li class="nav-item">
    <a class="nav-link text-dark" asp-area="" asp-controller="Home" asp-action="Privacy">Privacy</a>
</li>
@if (User.Identity.IsAuthenticated)
{
    <li class="nav-item">
        <a class="nav-link text-dark" asp-area="" asp-controller="Account" asp-action="Claims">Claims</a>
    </li>
}
8. Add the Claims view
You need to add the file Views\Account\Claims.cshtml and copy the code from the github repo. It’s just a little snippet that enumerates all claims into html.
9. Build and capture Service Providers SAML manifest
With all these changes, you should be able to build and run your application. The first thing you do when it launches is to capture its SAML manifest, since the way a SAML Service Provider (your webapp) and a SAML Identity Provider (B2C) works together is that they access each others SAML manifest to see information on the other party. You can get your webapp’s manifest by browsing to https://localhost:5001/Saml2. That will give you an XML file.
Since you are running your webapp as localhost, B2C will not be able to access your metadata and the authentication will fail. However, you can upload the XML file to anywhere public, like Azure Storage to OneDrive and make it public. Wherever you upload it, make sure that you can reach it via the browser anonymously.
10. App Registration in Azure AD B2C
We need to register an application in Azure AD B2C for the webapp. That is a very simple process and the steps are:
- +New Application
- Name = Saml2WebApp or similar
- Accounts in this organizational directory only
- Redirect URI – Web + https://localhost:5001 (the redirect uri is never used for SAML)
- Save
- Open the Manifest
- change the identifierUris: [] to be as below. This must match EntityId in appsettingsjson
“identifiersUris”: [ “https://localhost:5001/Saml2” ], - change the samlMetadataUrl to be as below (depending on where you stored it)
“samlMetadataUrl”: “https://yourstorage.blob.core.windows.net/public/localhost.5001_Saml2.xml”,
- change the identifierUris: [] to be as below. This must match EntityId in appsettingsjson
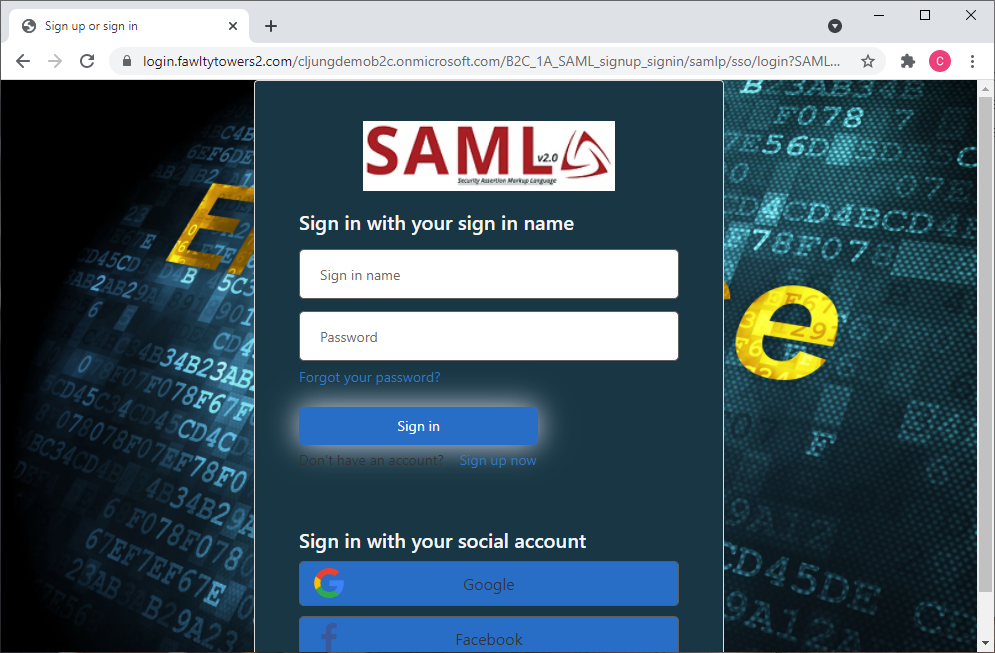
Running the Webapp
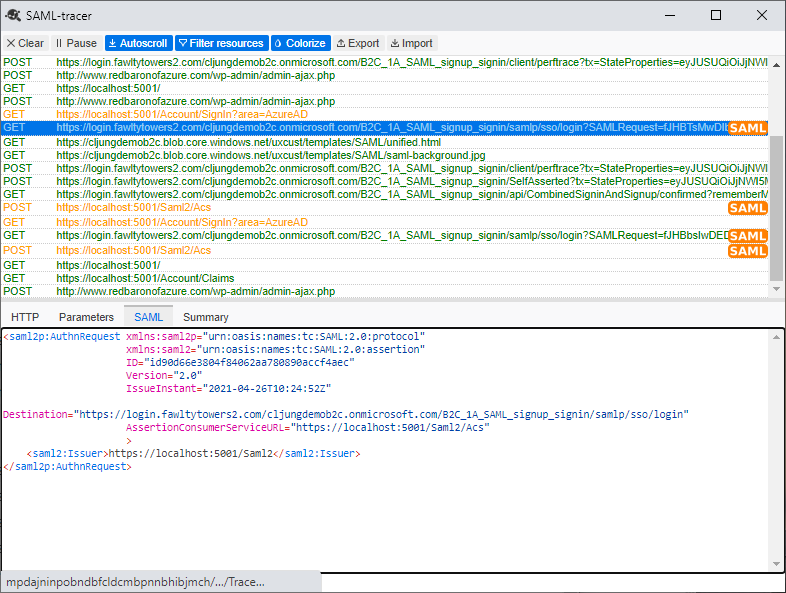
With everything ready, you should now be able to run the webapp and sign in and sign out. If you’re using Chrome or Firefox, I recommend installing the extension SAML-tracer as you get a handy tool that can capture and display the SAML specific messages being exchanged by your app and B2C